How to use Ttagcall
From sign-up to a confirmed match, here’s how you actually use Ttagcall, step by step.
▶ One minute is all it takes — the full Ttagcall flow
When Ttagcall makes life easier
Fieldwork schedules often slip and tangle because of weather and days off. With asphalt paving too, you’re in trouble if you haven’t lined up people and equipment in advance. That’s when Ttagcall comes in handy.
Even if you always work with the same mini-finisher, Bobcat, combi-roller, and excavator operators, calling each one every time is a hassle. In Ttagcall, you just make a group per equipment type and set the operators by priority. Set a date and send, and it contacts them in order from #1 and matches you instantly with the first operator who accepts.
Getting started
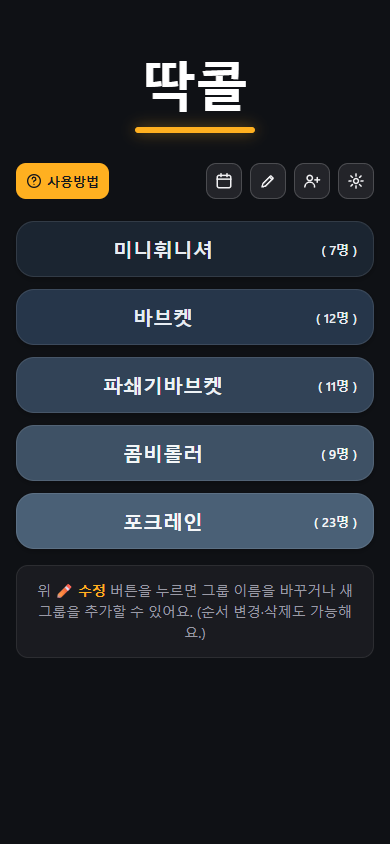
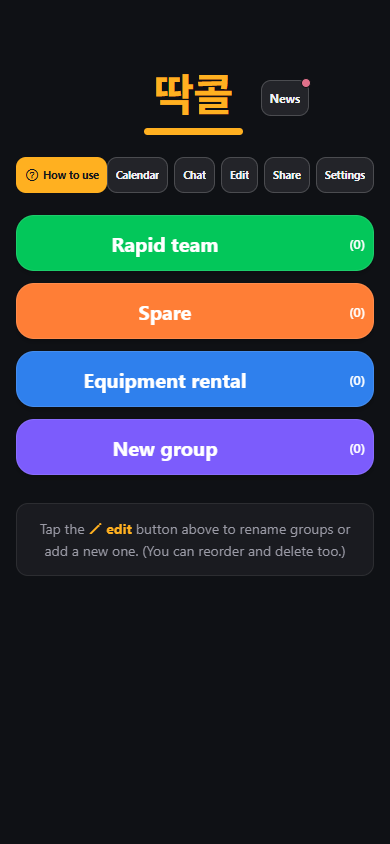
Sign up and log in quickly with a phone verification code. When you sign up, four default groups are created automatically so you can start right away. You can freely rename them, or add and delete groups.
On first launch you’ll be asked for a few permissions. In particular, please Allow “Stop optimizing battery usage“. Ttagcall is an app you only open when work comes up, so without this your phone may put the app to sleep and notifications can arrive late or silently. Allowing it means recruitment alerts arrive right away. (You can also turn it on later in Settings → Prevent delayed alerts.)
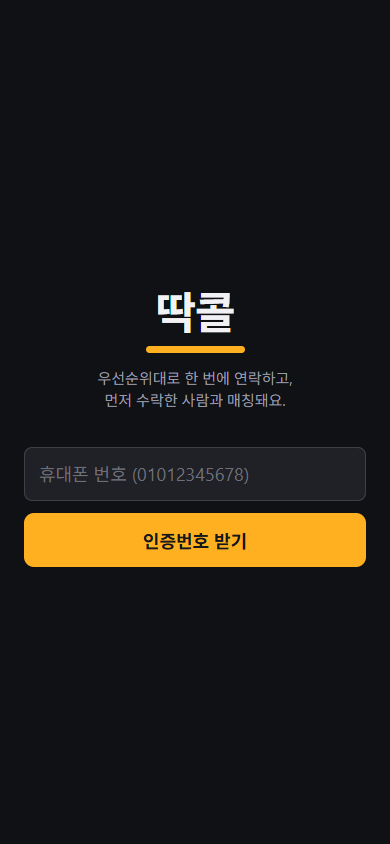
▶ Dark/light mode and language — set them however you like
Creating groups
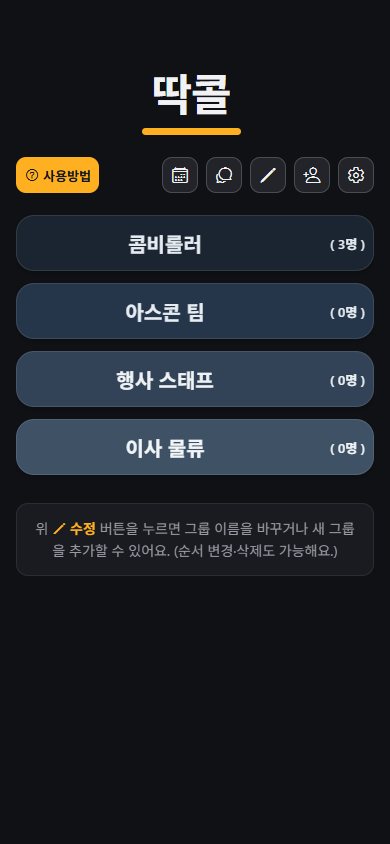
Tap the + icon at the top right of the home screen to create a new group. Think of a group as “a box that holds the people you’ll work with”. For example, you can manage several groups by equipment or role, like “Roller crew” or “Mini finisher crew”. Tap the pencil icon to rename or delete a group.
Adding people & setting priority
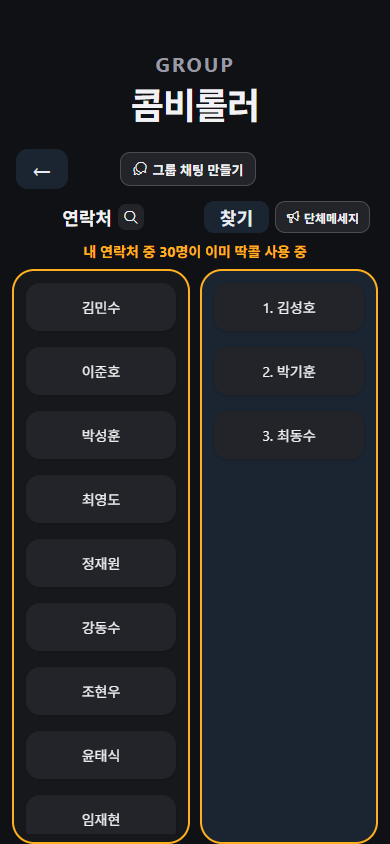
Tap a group to open its detail screen, which is split into two parts.
- Left “Contacts”: the full list of people in your phone’s address book (those not yet in this group)
- Right “Group members”: people already in this group, numbered in priority order
Tap a name on the left to move it to the group members on the right, and tap a member on the right to move it back to the left. The order of the member list on the right is the contact priority (#1 is contacted first). Press and hold a member and drag to change the order. People who haven’t installed the app yet are marked “(not installed)”. When you add them, they are saved to the group first, and then we ask whether to send the install link. If you added several people you can send to all of them at once, and to send later just tap Send install link below the group member list. You can put the same person in several groups at once — since each group is managed independently, the same person can be in both “Tech team” and “Spares”, for example, with a different priority in each, without affecting one another.
Creating a recruitment (“Find”)
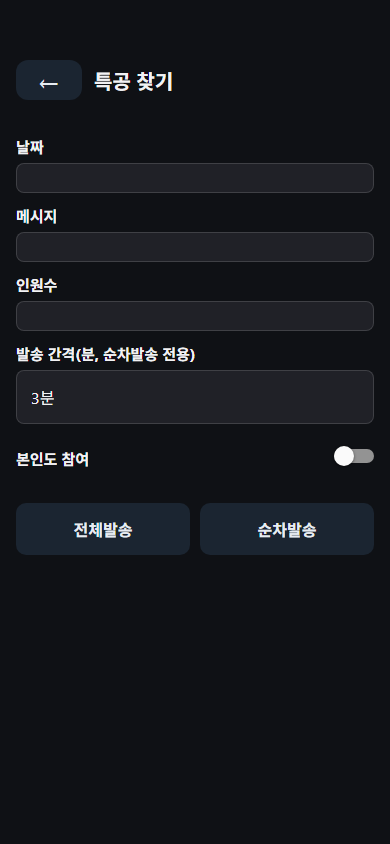
Tap the “Find” button at the top of the group screen to go to the recruitment creation screen. There are 4 things to set here.
- Date: when you need people (Saturdays appear in blue, Sundays in red)
- Message: what to say (you can also reuse a recently used message)
- Number of people: how many you need (if you request more than the number of actual app users, a notice appears and it’s blocked)
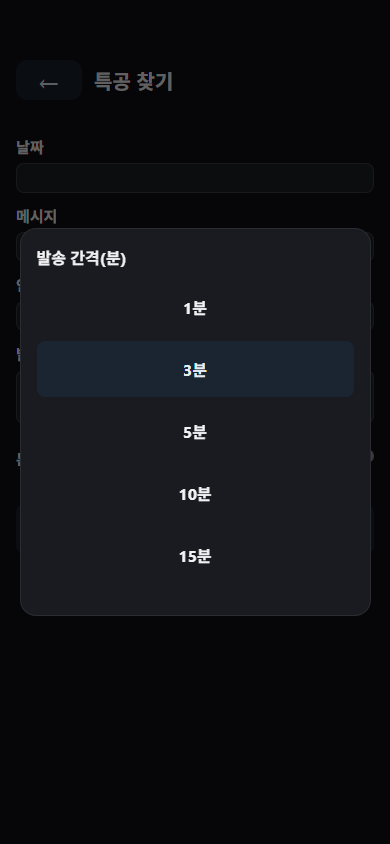
- Sending interval: how many minutes to wait before moving to the next person when there’s no reply
Broadcast vs sequential sending
There are two buttons at the bottom of the recruitment creation screen.
- Broadcast: contacts all group members at the same time. Use it when you need several people at once or want replies fast. It fills with whoever accepts within 5 minutes; if nobody accepts, we let you know and close it 1 minute later.
- Sequential: contacts priority #1 first, and if there’s no reply within the interval you set, it automatically moves on to #2, #3, and so on. If nobody has responded by the last person, we let you know and close it 1 minute later. Use it when you want to reach people one by one in priority order — this is Ttagcall’s core feature.
Once you set a time interval for sequential sending, that interval is remembered for the next time you search in the same group.
Checking responses
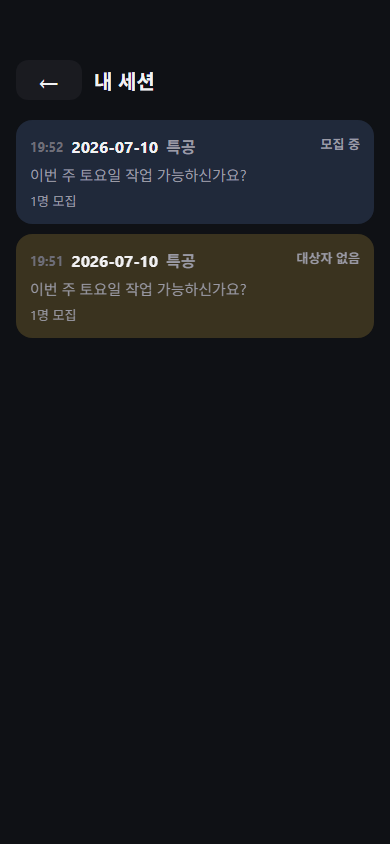
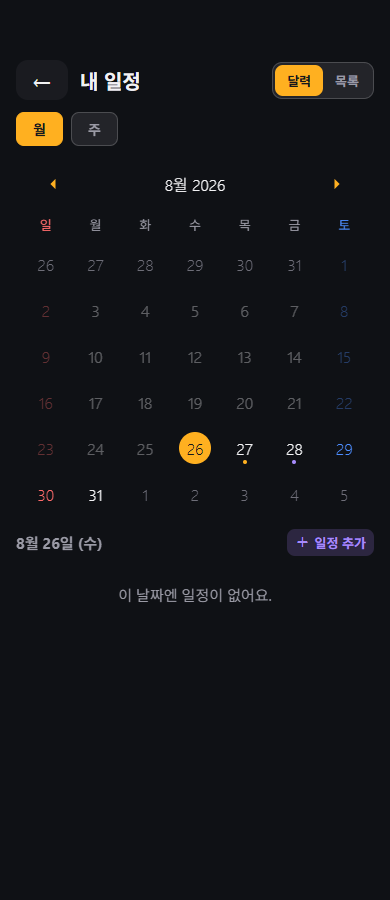
Tap the calendar icon on the home screen to open My schedule, where you can see every recruitment you’ve sent or received as a calendar or a list. Days with something scheduled get a dot under the date, and past dates are dimmed.
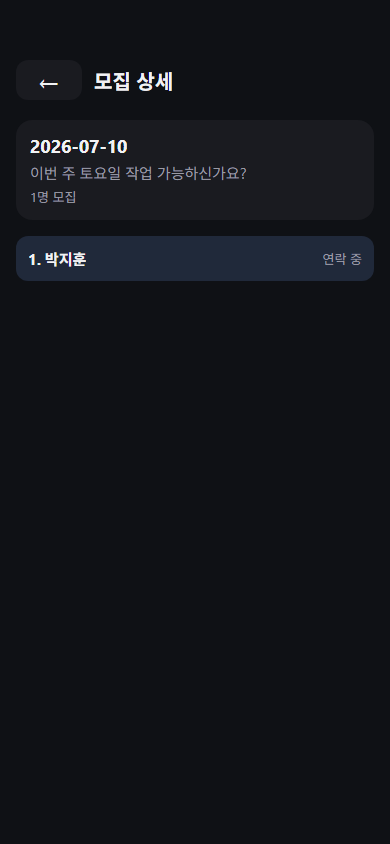
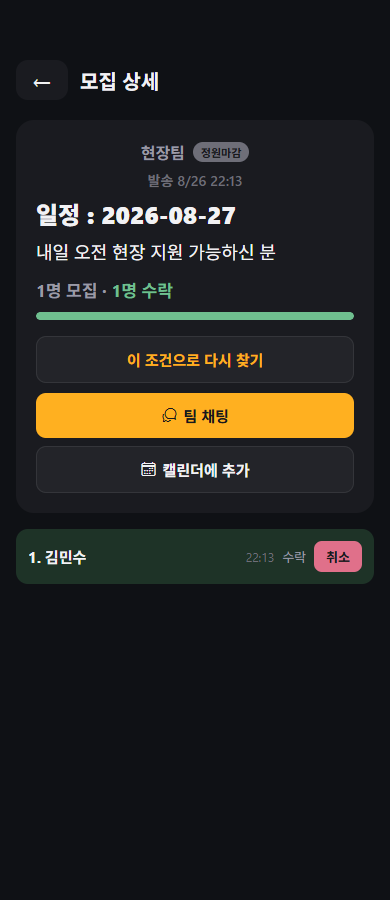
Tap a recruitment to see at a glance where each person stands (waiting / contacting / accepted / declined / no reply). If someone accepts while you have the screen open, it updates right away — no need to go back and re-enter. You can also cancel someone who already accepted and keep reaching the next person.
A badge next to the group name tells you where the recruitment stands. People who received the request see the same badge.
- In progress: still reaching out
- Full: you have everyone you needed
- No one left: no one else in the group to contact, so it ended
- Stopped by requester: the requester ended it themselves
Even if you haven’t filled every spot, you can end it yourself with Stop searching. No one else will be contacted, and it can’t be undone. If it ends with only some spots filled, we’ll tell you how many people joined.
Even before it closes, tapping Search again with these settings → Keep looking on this request closes the round on the spot and immediately contacts everyone who hasn’t replied yet.
For requests you received but couldn’t join because of a schedule clash, tap the trash icon on the card to remove them from your list. Requests you haven’t answered yet, or already accepted, are actual commitments for that day — those can’t be removed, and we’ll tell you why.
Managing your schedule
On the calendar, recruitment (matched) schedules are marked with an orange dot. If you’d like to note something personal that’s unrelated to matching (a doctor’s appointment, for example), select the date and tap Add event to save just a title and memo (no repeat or reminders). Personal events are marked with a purple dot, so you can tell at a glance when you’re working and when you have a personal commitment.
Once a recruitment is confirmed, you can add it to your phone’s own calendar app (Google, Samsung, etc.) with the Add to calendar button on the detail screen. If you need repeats or reminders, set those up directly in that calendar app.
▶ Move your Ttagcall schedule to Google/Samsung Calendar in one tap
Chatting
When a recruitment matches, a team chat for that team is created automatically. There are also group chats you set up per group, where you pick and invite app users from the group. Later, the room’s creator can also add Ttagcall users from their own contacts who aren’t in the group via ⋮ menu → Add members — they only join the chat and won’t receive recruitment requests. You can exchange text, photos (pick several at once from your album), and videos, and conversations are cleaned up automatically after 30 days.
Tap a photo or video to view it full screen inside the app (pinch or double-tap a photo to zoom). Tap the save button at the top right to save it to your phone’s gallery — chats are cleaned up after 30 days, so save anything you want to keep. Long-press a message to open a menu: copy or share text, save photos and videos to your phone, or delete a message from your screen only. For someone else’s message, you can also report or block the sender there.
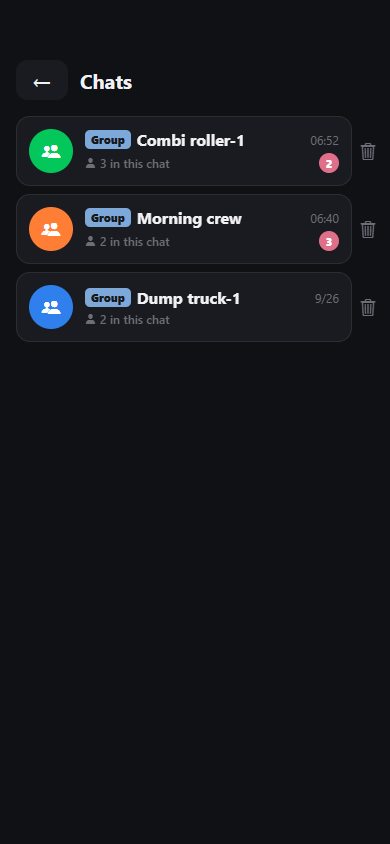
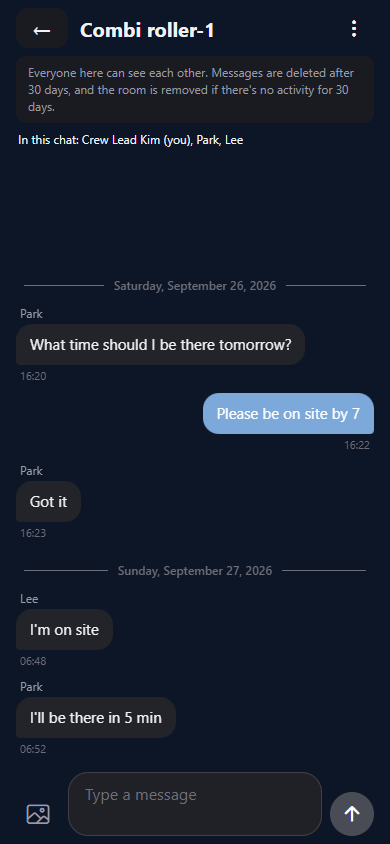
In the chat list, rooms with messages you haven’t read show a red number with the unread count, which disappears once you open the room. Inside a room, a date divider (e.g. Sunday, September 27, 2026) appears wherever the day changes, so you can easily tell yesterday’s messages from today’s.
Inside a chat room, the people in this chat are listed right under the notice. Names come from your own phone’s contacts; anyone you haven’t saved shows as a phone number. When several notifications from the same room pile up, tapping just one clears all of that room’s notifications.
The ⋮ menu at the top right of a chat room lets you mute notifications or hide the chat. A team chat is a matched team, so there’s no leaving it — hiding only removes it from your list, and it comes back when a new message arrives. In group chat rooms you can also rename the room.
You can create more than one group chat per group. The name is prefilled (Rapid team-1, Rapid team-2) and you can tap it to type your own, such as Morning crew — and rename it later from the room menu.
You can also use Broadcast on the group screen to notify everyone in the group at once.
▶ Create a group and try group chat, all in one clip
Reading news
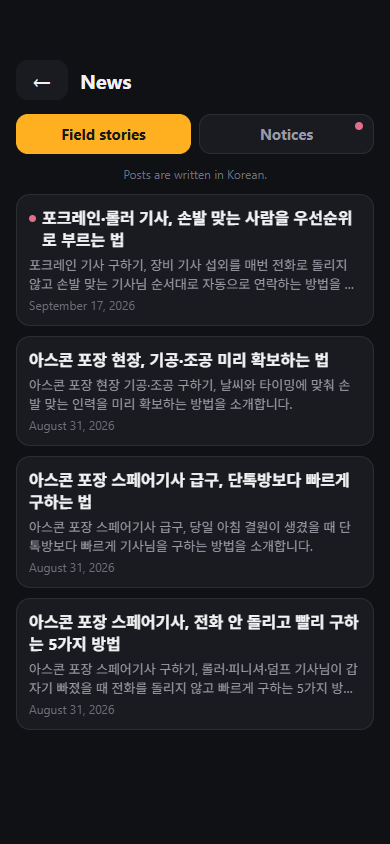
Tap the News button to the right of the Ttagcall logo at the top of the home screen to read the website’s Field stories (asphalt-paving site news and crew-finding tips) and Notices (update announcements) right inside the app. Posts are written in Korean.
When there’s a post you haven’t seen, a red dot appears on the News button and on that tab, and new posts in the list get a dot before the title. The dot disappears once you’ve checked. Tapping a new field-story notification opens the post right in the app, and Notices in Settings opens the same screen.
A real example — finding a combi-roller operator
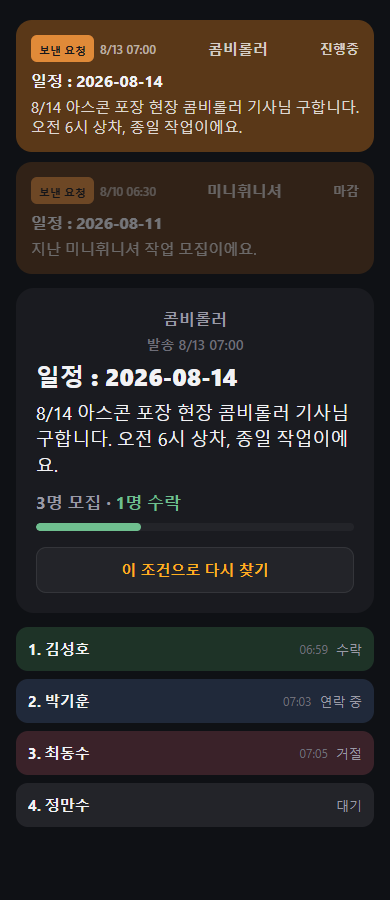
If you need a combi-roller operator at tomorrow’s asphalt paving site, just set a date in your “Combi-roller” group and send. Texts go out from #1 in order, and if there’s no reply it moves on to the next operator automatically.
Open the recruitment and you can see at a glance who has accepted, who’s being contacted, who declined, and who’s waiting. You’re matched instantly with the first operator who replies “yes”.
What if you’re the one who got contacted?
When a request comes in by text or app notification, it pops up automatically the moment you open the app. If you have an unanswered request waiting, you’ll also see a red dot badge on the home screen’s group box and on the group chat button.
Respond with one of two buttons: Accept or Schedule clash. Accepting confirms the match right away, and you can see the list of others you’ll be working with (teammates). Tapping Schedule clash politely declines the request, and the contact moves on to the next person automatically (in sequential sending).
Even if you’ve already accepted something else that same day, the new request still shows up as normal — but tapping Accept will warn you that you already have plans that date and block the accept. In that case, respond with Schedule clash instead.